HL7v2 Healthcare Integrations with 🫏 Mulesoft
The complete patient view — if you can wire it together
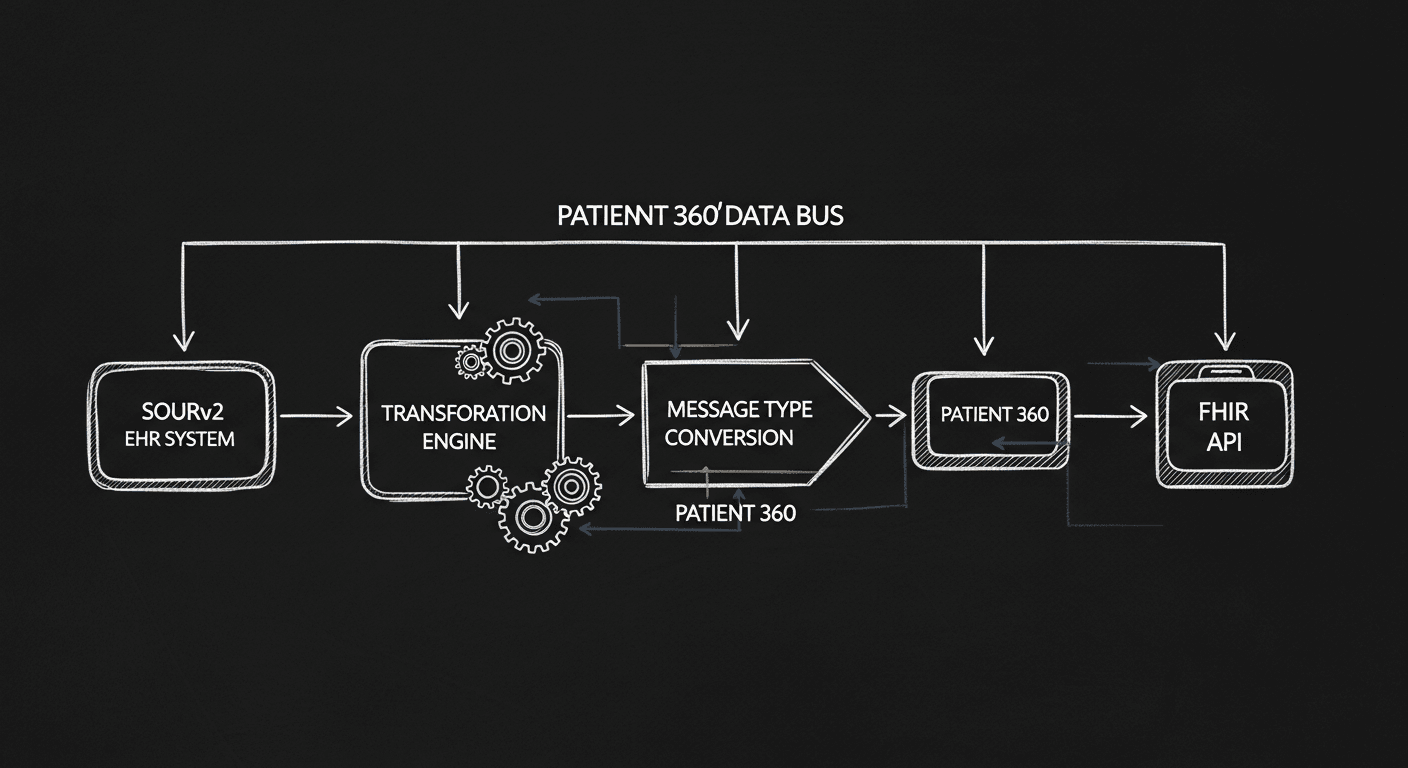
Patient 360 with MuleSoft Accelerator for Healthcare
MuleSoft Accelerator for Healthcare gives healthcare organizations a practical starting point for building a 360-degree patient view. The pitch is straightforward: unify clinical data from EHRs via FHIR and HL7 v2 integrations, feed it into Salesforce Health Cloud, and get a coherent patient record that your care teams can actually use.

The gap the accelerator is trying to close is real. A single health organization typically runs a dozen or more EHR platforms, and most of them won't talk to each other without custom glue code. MuleSoft's Patient 360 approach treats each system as an API-first citizen, making that glue reusable instead of one-off. In practice, this means faster time to a working Digital Front Door, better CRM data quality, and a cleaner foundation for any downstream analytics or AI work.

The accelerator bundles a few things worth calling out specifically. It ships purpose-built APIs and integration templates for the use cases that come up constantly in healthcare: EHR sync, patient demographics, ADT events, lab results. These cut real weeks off an integration project. It also handles the standards layer natively. HL7 v2 and FHIR are both supported out of the box, which means you're not writing custom parsers for each new source system.
On the connectivity side, the accelerator follows MuleSoft's API-led model. Systems get exposed as reusable APIs instead of point-to-point connections, which matters enormously when your fourth EHR integration wants to consume the same patient data your second one already built. Security and HIPAA compliance are baked into the templates. The platform runs on Anypoint, so you can deploy on-premises, in the cloud, or in a hybrid configuration depending on what your networking constraints actually require.

Getting started
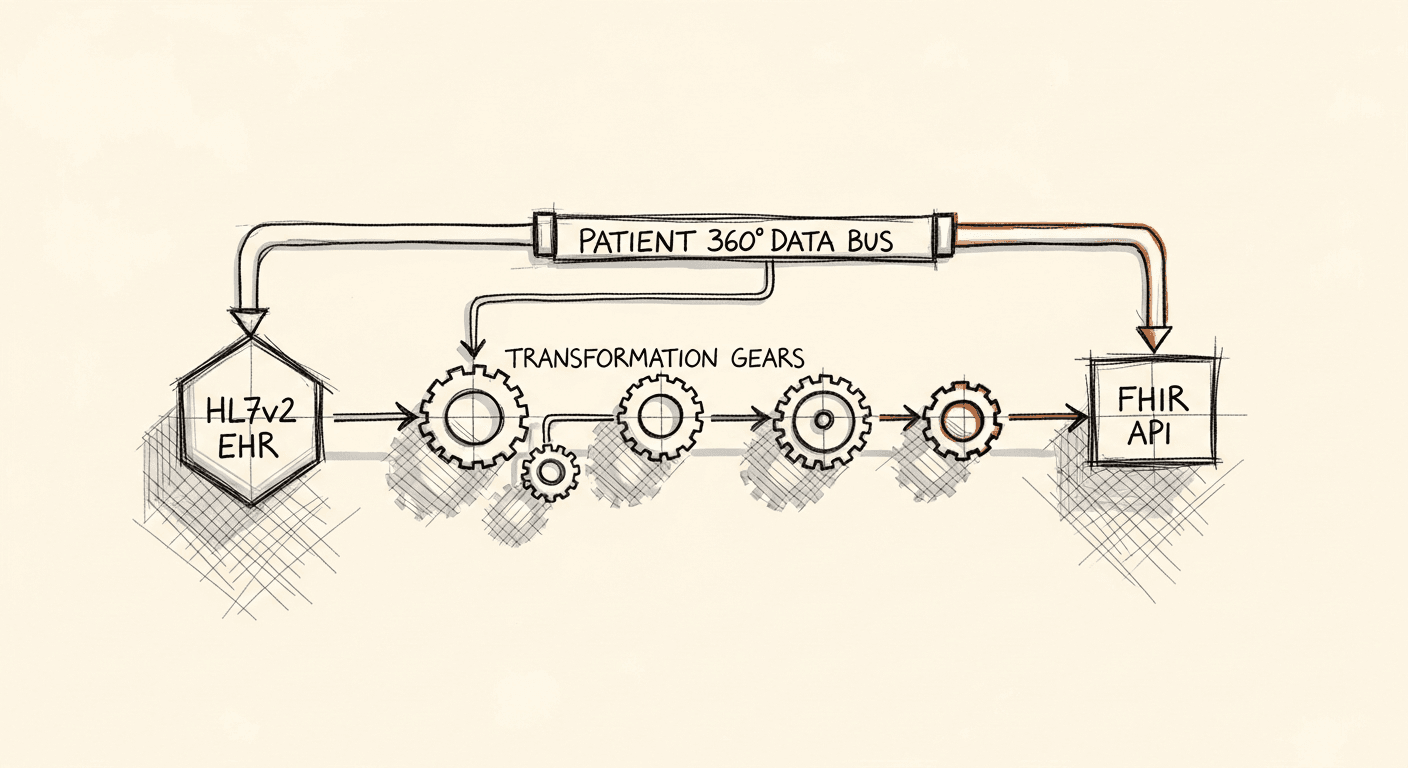
There are two main ways to hydrate Salesforce with patient data from an EHR: HL7 v2 and FHIR. This post focuses on the HL7 v2 path.

The FHIR path uses the Salesforce Patient Sync LWC component to search for a patient by name and date of birth, then sync their demographics and clinical resources into Health Cloud using the Patient Data Synchronization Process API.
The HL7 v2 path works differently. Your EHR or interface engine sends ADT, ORU, and SIU events over HTTP or MLLP. The HL7 v2 Events Management Listener picks those up, validates them, stores them in an intermediate datastore, and sends back an ACK. From there, the downstream processing pipeline moves the data into Salesforce.
Infrastructure
Anypoint Platform splits across two planes hosted in different locations, whether cloud or on-premise data center.
The control plane handles design, deployment, and management: Anypoint Design Center, Management Center, and Exchange all live here.
The runtime plane is where your Mule applications actually run. It includes the Mule runtime server and supporting services, and it's what you'll be operating in your own data center for this integration.
For an on-premise HL7 v2 setup, you'll have both planes in play. Getting this wired up correctly is what unlocks the ability to process hospital events and push them into Salesforce CRM.
Setting Up the HL7v2 Events Management Listener
Import the template into Anypoint Studio by clicking the Exchange icon in the upper left taskbar, logging in with your Anypoint Platform credentials, searching for the template, and clicking Open.

Once the template is imported, follow these configuration steps to run it:
1. Start by creating a simple app in Studio like the one depicted above. Please note the MLLP listener should have default settings, host 0.0.0.0 and port 30500.
2. Export your project to a JAR file.
3. Follow this knowledge article to upload the JAR to Cloudhub 2.0, but use the following payload in place of step #5:


Deploying the JAR

Before deploying via the Exchange API or the AMC Application Manager, you'll need two identifiers from your Anypoint Platform account: the Organization ID (how to find it) and the Environment ID (how to find it).
You'll also need a bearer token for authentication. The MuleSoft knowledge base covers two approaches: creating a connected app or generating a bearer token directly.
Update your pom.xml with the correct groupId, artifactId, and version per the Exchange REST API asset creation spec. For example:
    <groupId>18a04ea1-3b84-42fb-837a-bbcbe964f394</groupId>
	<artifactId>demo-ch2-helloworld</artifactId>
	<version>1.0.4</version>
	<packaging>mule-application</packaging>
	<name>demo-ch2-helloworld</name>
Publish the asset to Exchange using the values you collected above. Replace all angle-bracket placeholders with your actual values. The path_to_app_jar_name.jar refers to the location of your compiled Mule application JAR.

The MuleSoft docs cover packaging a Mule application in detail. If you prefer a GUI approach, Anypoint Studio can also export the app directly using the Studio import/export guide.
curl -X POST \
https://anypoint.mulesoft.com/exchange/api/v2/organizations/<;orgID>/assets/<groupId>/<artifactId>/<version> \
  -H 'Accept: application/json, text/plain, */*' \
  -H 'Authorization: Bearer <token>' \
  -H 'X-ANYPNT-ENV-ID: <envID>' \
  -H 'X-ANYPNT-ORG-ID: <orgID>' \
  -F 'files.mule-application.jar=@<path_to_app_jar_name.jar>' \
  -F 'files.pom=@<path_to_pom.xml>'
For Example:
curl -X POST \
https://anypoint.mulesoft.com/exchange/api/v2/organizations/18a04ea1-3b84-42fb-837a-bbcbe964f394/assets/18a04ea1-3b84-42fb-837a-bbcbe964f394/demo-ch2-helloworld/1.0.4 \
  -H 'Accept: application/json, text/plain, */*' \
  -H 'Authorization: Bearer <token>' \
  -H 'X-ANYPNT-ENV-ID: 7d1a0de5-8c49-4cc3-a21d-2566312469d2' \
  -H 'X-ANYPNT-ORG-ID: 18a04ea1-3b84-42fb-837a-bbcbe964f394' \
-F 'files.mule-application.jar=@/Users/<user_name>/demo-ch2-helloworld.jar' \
-F 'files.pom=@/Users/<user_name>/pom.xml'
-
Deploy a CloudHub 2.0 app via AMC Application Manager REST API
Below is an example of deploying a mule app "demo-helloworldb" to Shared Private Space with asset version 1.0.4 that got published in step 4.
curl --location 'https://anypoint.mulesoft.com/amc/application-manager/api/v2/organizations/<orgID>/environments/<envID>/deployments'; \
--header 'X-ANYPNT-ENV-ID: <envID>' \
--header 'X-ANYPNT-ORG-ID: <orgID>' \
--header 'Content-Type: application/json;charset=UTF-8' \
--header 'Authorization: Bearer <token>' \
--data '{
    "name": "demo-helloworlb",
    "labels": [
        "beta"
    ],
    "target": {
        ...
        "vCores": "0.1"
    }
}'
🎉 Awesome we are now deployed 🚀 Let's get back to the networking bits.
-
You can only access this from your private network and not through the internet*.
-
You can now access this endpoint per this format:
{application-url}.tcp.{environment}.
For my app viper, I took the app's name and only added "tcp" before
cloudhub.io: viper-azb63uc.mssa.usa-w1.tcp.cloudhub.i
Running a dig command, I can see that these are only accessible in the local network as RFC1918 address: dig +viper-azb63uc.mssa.usa-w1.tcp.cloudhub.io
Result:
136.32.32.222
111.32.32.222
- Doing a socket test from my local network, you should see succeeded like below:
app@psfour-549555dc46-pwdg8:/opt/mule$ nc -zvviper-azeiuc.yvs7m6.usa-w1.tcp.cloudhub.io 30500
Connection toviper-azeiuc.yvs7m7.usa-w1.tcp.cloudhub.io 30500 port [tcp/*] succeeded!
Testing the Application
The template accepts requests using HTTPS as well as MLLP listeners. Use tools like Advanced Rest Client or Postman to send requests over HTTPS. The template includes a postman collection in the src/test/resources folder for data ingestion simulation.
Troubleshooting
Validate Common Configuration
mule.env: Sets the environment where the application is to be deployed. Configure it inconfig-<mule.env>.yamlfile. For a studio deployment, the recommended mule.env value islocal.mule.key: Sets the encryption password for encrypting secure properties. Update as needed.
MariaDB
- A MariaDB is required to store the HL7 message. Run the
create-schema.sqlscript available undersrc/test/resources/scriptsfolder after obtaining access to a MariaDB instance. - Configure the necessary credentials in the properties file located in the
configfolder. Encrypt sensitive information and configure it in theconfig-secured-<env>.yamlfile.
HTTPS
https.host: Sets the service host interface. Configure it inconfig-<mule.env>.yamlfile.https.port: Sets the HTTPS service port number. Configure it inconfig-<mule.env>.yamlfile.
TLS
- Set up keystore properties for HTTPS operation. Refer to this link on how to generate the Keystore.
HL7 v2 Message Processing
- Configure the order of messages/events to be processed, parallel processing, sequential processing, and other specific configurations/rules for processing HL7 v2 messages.